blueqat
チュートリアルも充実してるし動画での解説もあるので取り掛かりやすいです。
https://blueqat.com/?hl=ja
環境
ローカルの環境を崩したくなかったので、PyCharm anacondaで作りました。それぞれURLからダウンロードできます。
- PyCharm Community版 https://www.jetbrains.com/ja-jp/pycharm/
- anaconda https://www.python.jp/install/anaconda/macos/install.html
- mac 10.15.5
python3.8の動作環境
anacondaをインストール後コンソールを立ち上げて以下のコマンドを入力して仮想環境を作ります。
$ conda create -n py38 python=3.8
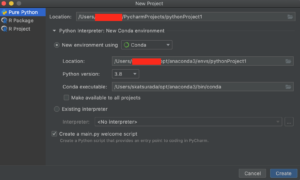
[New Project]

先ほど作った環境を選択
PyCharmのコンソールで
$ pip install blueqat動かしてみる
ソースはこちら
#test.py
from blueqat import Circuit

result = Circuit().x[0].m[:].run(shots=10)
print(result)
実行!
$ python test.py
Counter({'1': 10})
できた!
コードの中身についてはまたいずれ。
では!